Who hasn't experienced the screaming baby on a trip to pay the bills, go grocery shopping, or for the more adventurous a long road trip? It happens to all of us. For some mothers it is a constant battle and for others it is sporadic but when it happens it can be heartbreaking. None of us enjoy hearing our baby cry and this lack of enjoyment only increases when we are limited in our capability to fix the problem. Instead of focusing on what we cannot do this post will feature what we can do to help a crying car seat baby.
1. Assess the car seat - There is quite a bit to this step. Make sure the car seat is comfortable for the baby. Check the straps to see if they are too loose or too tight, make sure the incline is correct, feel the fabric and the buckles to see if they are super hot or cold, feel around for any hard bumps maybe a lost toy. You also want to check to see if your baby is being hit directly with sunlight as this causes many to cry.
2. Create a car toybox - Put several car safe toy in a car safe toybox. Then when baby cries reach back and hand him/her a toy, every time. The box should have a lid and be relatively soft. The toys should be soft as well, something that wouldn't harm baby if it went flying in a car crash.
3. Pull over - Sometimes, even when five minutes from your house, you just have to pull over and comfort baby for awhile. Enjoy this time together, I promise you'll miss it later and I promise it is more important than wherever you have to be in most cases.
4. Talk or Sing to baby - Many babies are soothed by their mother's voice. Even if baby isn't soothed they will know you care about them and hear them crying. It is a way of showing affection even when you can't stop the crying.
5. Put some ice in a mesh feeder or a baby sock - Many babies love to suck on these contraptions and it can keep them occupied quite a long time.
6. Offer a binky - If your baby takes a binky then be sure to offer it for the car ride. We have a special car binky.
7. Have a special car seat toy - This toy is only played with while in the car. Babies get bored easy so this helps create novelty.
8. Bring the car seat in the house and let baby play in it - This helps break down the association of car seat as something negative.
9. Place a poster safely on the seat in front of baby - They make special baby items for this purpose. It gives baby something to look at while you are driving.
10. Play music or white noise - Many babies are soothed by music or white noise.
11. Assess for a medical condition - Babies with reflux, for example, may need the incline of their car seat adjusted (within safety guidelines) to make sure that driving is comfortable for them. There are many baby items you can purchase to help with this.
Now I know I promised a list of things you can do versus things you shouldn't do but I fibbed a bit. I do feel the need to create a small list of "do-nots".
1. Do not leave handle up of the carseat unless the manual expressly says it is safe to do so. If it is safe to leave the handle up it is still not safe to hang toys from it.
2. Do no take baby out of car seat while you or someone else is driving. The risk is not worth the perceived benefit.
3. Do not turn around while driving, pull over if you must.
4. Do not turn the car seat around to forward-facing prematurely. A lot of people will say that their babies stopped hating the car seat once it was forward-facing. However, we now know that it is much safer to rear face your child for an extended period of time. The benefits of safety far outweigh the risk of having an unhappy child.
Friday, October 8, 2010

Wednesday, October 6, 2010
Baby Food: Spice is Nice
 Using spice in your baby food can be just as exciting as trying new foods! Babies enjoy flavorful foods just as much as we do and in many cultures babies are introduced to spices from the very start of solid introduction. In general though the recommendation is to wait eight months before introducing spices regularly into babies diet, this seems to be to prevent upset tummy. Keep in mind that it is still recommended to follow the "wait four days for every new item to allow for allergy" rule.
What I recommend is an entire food experience. Babies are sensory creatures. Choose your spice and introduce it to baby's many senses. Each time you introduce a new spice think of it as a sensory learning experience and do the following.
Sight and Sound: Since spices are so small and generally do not make much sound I've combined these two senses together. Get an empty jar of some sort that is clear like a plastic water bottle or an empty baby food jar. Put some spice in there with hard beans or rice. Then tape the top. Baby can use it as a home made rattle. Of course if you have the full version of herbs and spice baby can enjoy looking at them that way as well.
Smell: Put a dab of the spice on your finger, smell it. If it isn't too strong then hold about an inch away from baby's nose and allow baby to smell. Learning smells is a fun experience!
Touch: Put some of the spice in a bowl and let baby feel it. This will be fun for baby and perhaps even help the development and perfection of the pincher grasp. If your baby uses a pacifier this is the perfect time to let baby suck on it as it will help prevent the hand to mouth scenario. If baby does not then just be sure to keep a close eye on baby to make sure a handful of spice doesn't go into the mouth.
Taste: Mix the spice with one of baby's favorite foods and allow baby to taste it!
Here are some ideas of what foods and spices may work well together. The information was gathered from Wholesome Baby Foods.
"Fruits:
Apple(Sauce): use cinnamon, nutmeg, allspice, vanilla, ginger
Pears: use ginger, cinnamon, a drip of vanilla or even mint
Bananas: use cinnamon, ginger, allspice, vanilla
Dairy:
Plain Yogurt : use with mint, cinnamon, nutmeg, vanilla, ginger, allspice, cardamom
Vegetables:
Sweet potato: use with nutmeg, cinnamon and/or cardamom
Pumpkin: use with cinnamon, nutmeg, ginger and dash of vanilla
Carrots: use with basil & garlic - baked cinnamon carrots are yummy too.
Green beans: use with garlic powder
Mashed potatoes(white) : use with dill weed or garlic
Winter Squash (acorn, hubbard, butternut etc.): use with cinnamon, nutmeg, allspice, ginger
Cereals/Grains:
Pasta: use oregano, garlic, basil
Oatmeal or other cereals: use fruits, cinnamon & nutmeg, dash of vanilla
Rice (sweet) with cinnamon, nutmeg, dash of vanilla, cardamom, ginger
Quinoa (sweet): use cinnamon, nutmeg, dash of vanilla, cardamom, ginger for sweetQuinoa (savory): use garlic powder, pepper, onion powder, basil, oregano and others
Meats:
Chicken/Turkey with cinnamon and/or coriander
Chicken/Turkey with garlic powder and basil
Chicken/Turkey with lemon zest and pepper
Chicken/Turkey with basil & oregano
Chicken/Turkey with garlic and pepper
Chicken/Turkey with sage, rosemary and thymeBeef with garlic and pepper
Beef with onion powder and pepper
Beef with Orange Zest"
Baby Food: Making your Own Purees
There is a lot of difference in how we choose to feed our children outside of the breast or the bottle. So long as the food baby is receiving is healthy and mom is taking possible health considerations, like allergies, into consideration then it is really a process of what works best for your family.
A friend of mine helped me create a how-to of making your own purees. This is helpful for the moms who don't exactly trust the ingredients in processed baby food or the moms who want to save an extra dollar (because really who doesn't need that?).

- Blender or Baby Mill
- Ice Cube Trays
- Zip Lock Bags
- Stove
- Pot
- Baking Dish
- Steamer
1. Assess what type of cooking your food will need.
a. Foods you would normally put in the oven to cook for yourself like potato or in a pie like apples and peaches you probably want to bake until soft.
b. Foods you would normally steam for yourself like green beans, broccoli, and peas or foods like berries you probably want to steam until soft.
c. You can use the resource at the bottom of the page to check out how to best prepare each food for cooking. They give information like which foods need to be peeled and which do not.
2. Let the food cool after cooking.
3. Put the food in a blender. You have a choice to use a liquid to make the food a bit smoother or not. Many moms do use this option. If you do then you must make a choice on which liquid to use. Here are some options.
a. Breast Milk
b. Water from the steamer you used to soften the food. This will not work for foods high in nitrates like beets, spinach, and carrots.
c. Water from the tap
d. If you are making a "poopy" meal to help with constipation you may choose to use a small amount of no-sugar added juice.
4. Puree to the consistency that you and your baby prefer.
5. Scoop and put into your ice cube trays. Let sit for 24 hours (or until generally frozen solid).
6. Once frozen you can pop the food out of the trays and put into your ziploc bags. Please label the bags with both item and date. This helps with health and safety issues. Ziploc bags remain in the freezer.
7. In a typical freezer foods are good for about one month. In a deep freezer they are good about three months with the exception of meats which are good only one month no matter where they are stored.
8. When it is time to eat then take out the number of cubes you prefer and defrost. Some choose to defrost in a pot and some use the microwave. Each cube is approximately one ounce of food.
a. To defrost with a microwave then you put into a microwave safe bowl and heat. After heating be sure to stir well as to avoid hidden hot pockets.
b. To defrost without a microwave take the food out and put into a bowl. Put this bowl in a bowl of warm water.
c. To defrost the simple way just take out, put in a bowl, and leave in the refrigerator to defrost.
d. Foods are good in the fridge for approximately 72 hours, in a sealed container, so in general you can defrost an entire days food at the same time. Just take it out when you make breakfast for yourself or when you get up in the morning. But do not simply leave on the counter to sit because this can cause bacteria growth.
e. Do not re-freeze food that has been thawed.
Wholesome Baby Foods
A friend of mine helped me create a how-to of making your own purees. This is helpful for the moms who don't exactly trust the ingredients in processed baby food or the moms who want to save an extra dollar (because really who doesn't need that?).
Items Needed:

- Blender or Baby Mill
- Ice Cube Trays
- Zip Lock Bags
- Stove
- Pot
- Baking Dish
- Steamer
Process:
1. Assess what type of cooking your food will need.
a. Foods you would normally put in the oven to cook for yourself like potato or in a pie like apples and peaches you probably want to bake until soft.
b. Foods you would normally steam for yourself like green beans, broccoli, and peas or foods like berries you probably want to steam until soft.
c. You can use the resource at the bottom of the page to check out how to best prepare each food for cooking. They give information like which foods need to be peeled and which do not.
2. Let the food cool after cooking.
3. Put the food in a blender. You have a choice to use a liquid to make the food a bit smoother or not. Many moms do use this option. If you do then you must make a choice on which liquid to use. Here are some options.
a. Breast Milk
b. Water from the steamer you used to soften the food. This will not work for foods high in nitrates like beets, spinach, and carrots.
c. Water from the tap
d. If you are making a "poopy" meal to help with constipation you may choose to use a small amount of no-sugar added juice.
4. Puree to the consistency that you and your baby prefer.
5. Scoop and put into your ice cube trays. Let sit for 24 hours (or until generally frozen solid).
6. Once frozen you can pop the food out of the trays and put into your ziploc bags. Please label the bags with both item and date. This helps with health and safety issues. Ziploc bags remain in the freezer.
7. In a typical freezer foods are good for about one month. In a deep freezer they are good about three months with the exception of meats which are good only one month no matter where they are stored.
8. When it is time to eat then take out the number of cubes you prefer and defrost. Some choose to defrost in a pot and some use the microwave. Each cube is approximately one ounce of food.
a. To defrost with a microwave then you put into a microwave safe bowl and heat. After heating be sure to stir well as to avoid hidden hot pockets.
b. To defrost without a microwave take the food out and put into a bowl. Put this bowl in a bowl of warm water.
c. To defrost the simple way just take out, put in a bowl, and leave in the refrigerator to defrost.
d. Foods are good in the fridge for approximately 72 hours, in a sealed container, so in general you can defrost an entire days food at the same time. Just take it out when you make breakfast for yourself or when you get up in the morning. But do not simply leave on the counter to sit because this can cause bacteria growth.
e. Do not re-freeze food that has been thawed.
Great Resource:
Wholesome Baby Foods
Thursday, September 30, 2010
Breastfeeding: Waking a Sleeping Baby
My daughter was born three weeks early and had a case of "sleepy baby syndrome". She slept all the time, even through feedings. So we were told to wake her up for her feedings and to keep her awake during them. I can tell you that it wasn't an easy task. However, I did learn a few tips that I can pass onto you.
Before giving sleepy baby advice I want to give a couple additional helpful tips. What I want to say first is that if your baby is losing weight because of "sleepy baby syndrome" then you need to be careful about how often you are feeding your infant. Make sure to wake baby quite strictly every 2-2.5 hours from the *beginning* of the last feeding. Also keep in mind that you can supplement baby with pumped breastmilk using a syringe or spoon if needed. You do not have to use formula as breastmilk is higher in calories than formula anyhow. Sometimes a Pediatrician will push formula as the solution to this problem but I can promise you there are many other options. Additionally you are typically allowed one 4 hour stretch of sleep at night.
Waking a Sleepy Baby and Keeping Baby Awake while Breastfeeding:
1. Change baby's diaper. This is always the best first thing to try. It often works and it is nice to keep a fresh diaper on a new infant anyhow.
2. Hold baby upright and rub baby's back.
3. Strip baby down to diaper.
4. Gently scratch or rub baby's head, ears, feet, or back.
5. While feeding use breast compressions. This is where you squeeze your breast above the areola, gently and in slow repetitions.
6. If all these steps fail you can put a damp washcloth or diaper wipe on baby's feet.
7. When every step above fails some parents resort to washing baby's face with cool water. This is something that only should be resorted to after you have repeatedly tried the above steps. It is not pleasant for baby and is only a last resort.
Before giving sleepy baby advice I want to give a couple additional helpful tips. What I want to say first is that if your baby is losing weight because of "sleepy baby syndrome" then you need to be careful about how often you are feeding your infant. Make sure to wake baby quite strictly every 2-2.5 hours from the *beginning* of the last feeding. Also keep in mind that you can supplement baby with pumped breastmilk using a syringe or spoon if needed. You do not have to use formula as breastmilk is higher in calories than formula anyhow. Sometimes a Pediatrician will push formula as the solution to this problem but I can promise you there are many other options. Additionally you are typically allowed one 4 hour stretch of sleep at night.
Waking a Sleepy Baby and Keeping Baby Awake while Breastfeeding:
1. Change baby's diaper. This is always the best first thing to try. It often works and it is nice to keep a fresh diaper on a new infant anyhow.
2. Hold baby upright and rub baby's back.
3. Strip baby down to diaper.
4. Gently scratch or rub baby's head, ears, feet, or back.
5. While feeding use breast compressions. This is where you squeeze your breast above the areola, gently and in slow repetitions.
6. If all these steps fail you can put a damp washcloth or diaper wipe on baby's feet.
7. When every step above fails some parents resort to washing baby's face with cool water. This is something that only should be resorted to after you have repeatedly tried the above steps. It is not pleasant for baby and is only a last resort.
Take Action: Facebook deletes breastfeeding photos
Facebook is one of the leading social networking sites. Currently Facebook has over 500 million active users and approximately fifty percent of those users log in daily. It is far reaching. I admit that I enjoy Facebook tremendously.
This social networking site may be fun and a pleasure to use but they endorse a practice that is highly deserving of admonishment. I have considered deleting my Facebook account several times due to this practice but would prefer a more proactive approach. They delete pictures of women breastfeeding if any areola or nipple is showing in the picture. Additionally they delete entire profile's of women in some circumstances for having these types of pictures.
These pictures are on personal sites. So the only people that are seeing them are people who choose to look at your pictures. Additionally they are on Facebook groups so once again are only seen by people who choose to join a group and look at the pictures. They are not innocently stumbled upon and they are not put in the face of the general population. There is no legitimate reason these pictures should be deleted.
Here is the statement by Facebook on this policy:
"We agree that breastfeeding is natural and beautiful and we’re very glad to know that it is so important to some mothers to share this experience with others on Facebook. We take no action on the vast majority of breastfeeding photos because they follow the site’s Terms of Use. Photos containing a fully exposed breast (as defined by showing the nipple or areola) do violate those Terms and may be removed. These policies are designed to ensure Facebook remains a safe, secure and trusted environment for all users, including the many children (over the age of 13) who use the site."
The idea that exposure of the breast when breastfeeding is somehow unsafe or insecure is really quite disgusting and practically it is unfounded. This is coming from a site who regularly allows pictures of women in bikinis, thongs, and doing all sorts of socially questionable activities. This site also allows pictures of artificial nipples because what else is bottle other than an artificial nipple?
Forget the morality of the issue for a minute though. Public breastfeeding is protected by law in all but two states within the United States. Women have a legal right to have pictures of them nurturing and comforting their child at the breast.
Take Action:
1. Include breastfeeding photos in your Facebook photo albums.
2. Do not put up with people reporting your pictures. Make it clear that if someone reports one of your breastfeeding pictures, no matter who they are, they will no longer be a friend on your Facebook account. The majority of photos deleted have been reported to Facebook by someone with access to those photos.
3. Join this Facebook group which is aimed at letting Facebook know that it's members do not agree with their policy. "Hey Facebook, breastfeeding is not obscene!"
4. Contact Facebook and let them know that you do not support their policy. The more of us that do this the better. You can do this by sending Mark Zuckerberg a private message directly. If you have other ways of contacting Facebook on this matter please let me know.
5. Make this a point on your own blog or website. Ask your friends to do the same. Let's make a big deal out of this!
If you have additional ways we can make a call to action against Facebook in this regard please leave them in the comments section.
Facebook Statistics Source
Facebook's Policy on Breastfeeding Pictures Source
This social networking site may be fun and a pleasure to use but they endorse a practice that is highly deserving of admonishment. I have considered deleting my Facebook account several times due to this practice but would prefer a more proactive approach. They delete pictures of women breastfeeding if any areola or nipple is showing in the picture. Additionally they delete entire profile's of women in some circumstances for having these types of pictures.
These pictures are on personal sites. So the only people that are seeing them are people who choose to look at your pictures. Additionally they are on Facebook groups so once again are only seen by people who choose to join a group and look at the pictures. They are not innocently stumbled upon and they are not put in the face of the general population. There is no legitimate reason these pictures should be deleted.
Here is the statement by Facebook on this policy:
"We agree that breastfeeding is natural and beautiful and we’re very glad to know that it is so important to some mothers to share this experience with others on Facebook. We take no action on the vast majority of breastfeeding photos because they follow the site’s Terms of Use. Photos containing a fully exposed breast (as defined by showing the nipple or areola) do violate those Terms and may be removed. These policies are designed to ensure Facebook remains a safe, secure and trusted environment for all users, including the many children (over the age of 13) who use the site."
The idea that exposure of the breast when breastfeeding is somehow unsafe or insecure is really quite disgusting and practically it is unfounded. This is coming from a site who regularly allows pictures of women in bikinis, thongs, and doing all sorts of socially questionable activities. This site also allows pictures of artificial nipples because what else is bottle other than an artificial nipple?
Forget the morality of the issue for a minute though. Public breastfeeding is protected by law in all but two states within the United States. Women have a legal right to have pictures of them nurturing and comforting their child at the breast.
Take Action:
1. Include breastfeeding photos in your Facebook photo albums.
2. Do not put up with people reporting your pictures. Make it clear that if someone reports one of your breastfeeding pictures, no matter who they are, they will no longer be a friend on your Facebook account. The majority of photos deleted have been reported to Facebook by someone with access to those photos.
3. Join this Facebook group which is aimed at letting Facebook know that it's members do not agree with their policy. "Hey Facebook, breastfeeding is not obscene!"
4. Contact Facebook and let them know that you do not support their policy. The more of us that do this the better. You can do this by sending Mark Zuckerberg a private message directly. If you have other ways of contacting Facebook on this matter please let me know.
5. Make this a point on your own blog or website. Ask your friends to do the same. Let's make a big deal out of this!
If you have additional ways we can make a call to action against Facebook in this regard please leave them in the comments section.
Facebook Statistics Source
Facebook's Policy on Breastfeeding Pictures Source
Wednesday, September 29, 2010
Breastfeeding: Lipase Solutions for Working Moms
If your milk tastes or smells odd after freezing and you are sure it hasn't had time to sour then you may be wondering what is wrong. Or perhaps you've already figured it out and are just looking for solutions.
Some mothers have an excessive amount of Lipase in their breastmilk. Lipase naturally occurs in all breast milk, just more so in some mothers. The indication of a lipase issue is that you freeze your milk properly and thaw it properly and after doing so your milk tastes bad. These tastes are often described as soapy, sour, or skunky. Milk with excessive lipase is okay to feed your infant but the problem occurs when a baby does not like the funny taste and thus refuses to drink it.
The proper way to deal with excessive lipase is to scald your milk before you freeze it.
How to Scald:
* Put your pumped or expressed breastmilk in a sauce pan and heat to approximately 180 F (82 C). This will generally be when you see little bubbles around the edge of the pan. Do not heat to a full rolling boil.
* Quickly cool and store the milk.
(caveat: some moms prefer to heat only to 160 because it is believed to leave a small amount more nutrients, for some mothers this will work and for some it will not).
It is a bit extra work to scald your milk but generally this method works and all is well. However if you are planning to return to work you may be wondering how you can possible deal with all these extra steps. Don't fret it can be done quite simply!
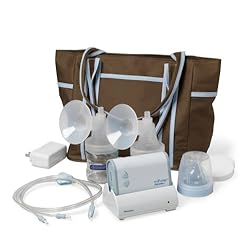
First however you need to run a couple of tests to find out what method will work for you.
Test #1: Express your milk and put it in the refrigerator. Test hourly for taste. How long does it take to turn sour?
The purpose of this test is to let you know how long it takes for your milk to start tasting bad. If it does not start tasting bad until well after 24 hours then you may not need to freeze your milk at all. You can simply pump and put it in the fridge for the next day.
Test #2: Express your milk and put it in the refrigerator for the same amount of time you'd be at work . Then scald the milk. Repeat first test.
The purpose of this test is to see if after scalding and freezing your milk will thaw without tasting bad. If you pass this test then you know that scalding will work for you. Go back to the findings of test one. Assess how long you will be at work. If you are going to be at work for 8 hours and your milk does not start tasting bad until 10 hours refrigerated then you can simply pump your milk at work, store it, and bring it home to scald.
m
Test #3: Repeat test two except heat milk to 160 F instead of 180 F or visa versa depending on where you started.
The purpose of this test is simply to see if you can heat to a lower amount as to possibly leave a few additional nutrients in your milk. Your breastmilk still has plenty of wonderful nutrients at 180 degrees, so this is an optional test.
Test #4: Use a bottle warmer to scald your milk. Most moms say this takes them a minute or two. You may need to experiment with this until you find the right way to scald your milk using this device.
If after completing the first three tests you realize your milk tastes bad quite shortly after pumping, if you have not scalded it, then you know you need to scald while at work. This is typically possible using a bottle warmer. After pumping at work then scald your milk using a bottle warmer then cool. Freeze when you get home.
Information obtained from kellymom.com and llli.org I am always open to corrections and feedback on additional ways to help tackle this issue.
Some mothers have an excessive amount of Lipase in their breastmilk. Lipase naturally occurs in all breast milk, just more so in some mothers. The indication of a lipase issue is that you freeze your milk properly and thaw it properly and after doing so your milk tastes bad. These tastes are often described as soapy, sour, or skunky. Milk with excessive lipase is okay to feed your infant but the problem occurs when a baby does not like the funny taste and thus refuses to drink it.
The proper way to deal with excessive lipase is to scald your milk before you freeze it.
How to Scald:
* Put your pumped or expressed breastmilk in a sauce pan and heat to approximately 180 F (82 C). This will generally be when you see little bubbles around the edge of the pan. Do not heat to a full rolling boil.
* Quickly cool and store the milk.
(caveat: some moms prefer to heat only to 160 because it is believed to leave a small amount more nutrients, for some mothers this will work and for some it will not).
It is a bit extra work to scald your milk but generally this method works and all is well. However if you are planning to return to work you may be wondering how you can possible deal with all these extra steps. Don't fret it can be done quite simply!
First however you need to run a couple of tests to find out what method will work for you.
Test #1: Express your milk and put it in the refrigerator. Test hourly for taste. How long does it take to turn sour?
The purpose of this test is to let you know how long it takes for your milk to start tasting bad. If it does not start tasting bad until well after 24 hours then you may not need to freeze your milk at all. You can simply pump and put it in the fridge for the next day.
Test #2: Express your milk and put it in the refrigerator for the same amount of time you'd be at work . Then scald the milk. Repeat first test.
The purpose of this test is to see if after scalding and freezing your milk will thaw without tasting bad. If you pass this test then you know that scalding will work for you. Go back to the findings of test one. Assess how long you will be at work. If you are going to be at work for 8 hours and your milk does not start tasting bad until 10 hours refrigerated then you can simply pump your milk at work, store it, and bring it home to scald.
m
Test #3: Repeat test two except heat milk to 160 F instead of 180 F or visa versa depending on where you started.
The purpose of this test is simply to see if you can heat to a lower amount as to possibly leave a few additional nutrients in your milk. Your breastmilk still has plenty of wonderful nutrients at 180 degrees, so this is an optional test.
Test #4: Use a bottle warmer to scald your milk. Most moms say this takes them a minute or two. You may need to experiment with this until you find the right way to scald your milk using this device.
If after completing the first three tests you realize your milk tastes bad quite shortly after pumping, if you have not scalded it, then you know you need to scald while at work. This is typically possible using a bottle warmer. After pumping at work then scald your milk using a bottle warmer then cool. Freeze when you get home.
Information obtained from kellymom.com and llli.org I am always open to corrections and feedback on additional ways to help tackle this issue.
Tuesday, September 28, 2010
Sleep Solution: Replace Your Mommy Mantra


Image from helpfornewmoms.com
"Will this child ever sleep?""I am so tired."
"It's 3:00 a.m. so if baby goes to sleep now I'll get 4 hours of sleep."
"How am I going to function tomorrow?"
"This happens every night."
"I wish baby would just stop crying."
Do these phrases sound familiar? Think about them carefully. What mantra do you repeat to yourself when you are up late with your baby, toddler, or child?
Such mantras add more stress to your life. Positive thinking can go a long way to changing your feelings about difficult situations.
I understand that the solution I'm hinting at seems overly simple. For that reason many of you will dismiss this advice and continue doing what hasn't been working. That is your right. However, ask your self this: what would it hurt to try this out? This method takes little extra time and minimal effort to try out. If you are at the point of considering parenting methods that are not widely considered gentle you might as well give this a try.
Here is the method:
1. Turn your clock around to face the wall.
2. Do nothing physically different tonight (or the next night your sweet child is up all night or having trouble going down to sleep). But keep a pen and paper nearby. When you start feeling overwhelmed write down the thoughts that repeat in your mind.
3. The next day when you are feeling a bit more refreshed read over your mommy mantras. Consider how unhelpful they are. Consider this: In the moment that you are completely exhausted and frustrated you don't have too much control over how the night turns out and thus how much sleep you and baby get.
4. Now replace your mommy mantras with something useful. This may take a bit of thought or a night or two of trial and error. Practice repeating this mantra throughout the day.
5. The next time you have a long night stop yourself when you are repeating the negative mommy mantras. If you must wear a hairband around your wrist and snap it when you start the negative thought process then do it. For some that is effective but most will not need it. If the physical pain of the wrist snap makes you even more frustrated then take a sip of water each time you say something negative.
6. Now replace your negative mantras with your positive ones. Repeat as necessary. Absolutely do not let the negative ones repeat. As soon as you notice it, even the feeling of it, stop it.
Give the method a week and after the week assess how well you have been completing the steps. You can't do it halfway. You must be committed. If you have followed the steps appropriately then assess if it has been working for you. Are you less stressed about night wakings or bedtime? If it has worked for you then fantastic. If not then it's time to move on to more extensive sleep solutions. Or perhaps you just need to find another way to stop the negative mommy mantra.
In addition to replacing your mantra with something positive find other ways to enjoy bedtime or night wakings. Tape a favorite tv show and watch it (you may need to put the caption on), start a painting that you only work on at night, have a night yoga routine, save a special sweet treat for these exhausting nights, record some positive mood music. I know that enjoying this time is difficult but it is possible or mostly possible.
I've been trying to get my little girl to sleep for several hours now only to finally get her down to sleep. She will wake several more times tonight but I'm not worried about that, the worst is over for us tonight. During our difficult sleep session tonight I had a brief moment of reflection that led me to type this out. I thought to myself "wow, I am amazingly calm, why?". Thankfully I could identify the answer. I used to be a sleep freak. I mean I coveted my sleep. Of course I was a huge sufferer of insomnia and plenty of other sleep issues so sleep was a huge commodity for me. What made my sleepless nights most difficult was the negative mantras I would say to myself and the constant clock checking. Once I was able to stop these behaviors I ended up relaxing so much more about bedtime. Now I'm grateful that I've had that experience, it has served me well as a mommy.
Subscribe to:
Posts (Atom)